
Every listing on e-SwapMeet starts with a product type. It’s a decision you only make once, right when you create the listing, but it decides a lot of what happens next: which fields show up on the rest of the form, whether your item has one price or several, and whether the sale even happens through e-SwapMeet’s own cart and checkout at all. e-SwapMeet gives vendors four product types to choose from, and picking the one that actually matches what you’re selling saves you from having to rebuild a listing later.
Table of Contents
Why Product Type Matters
Product type is the first real decision on any new listing, and it’s a structural one, not a cosmetic one. It controls whether you set a single price or a price per variation, whether the whole Shipping and Tax panel even appears, and in one case, whether the sale happens on e-SwapMeet at all. Understanding what each of the four types actually does before you pick one saves a rebuild later.
Simple Products
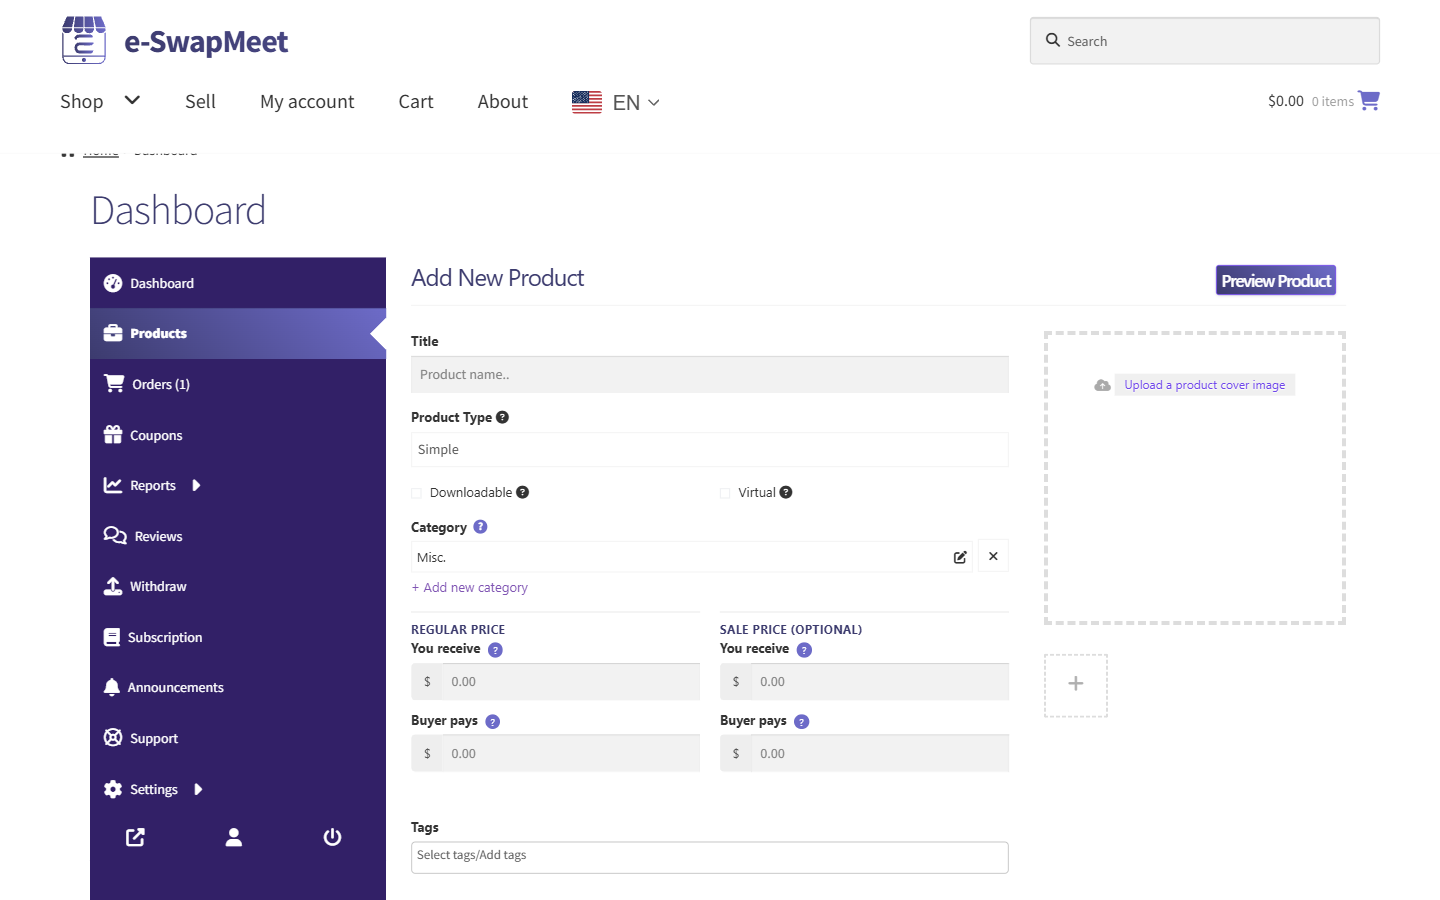
Simple is what e-SwapMeet selects for you by default on a new listing, and it’s the right choice for an item that comes in exactly one version: one price, one quantity, nothing for the buyer to pick between. With Simple selected you get the full standard set of fields: Regular Price and Sale Price (shown as both what you receive and what the buyer pays, since e-SwapMeet’s processing-fee markup is built into the buyer-facing number), Category, Inventory, and the complete Shipping and Tax panel, including Shipping Class. Most swap-meet-style inventory, one-off items with nothing to size, color, or vary, belongs here.
Variable Products
Variable is for a product that comes in more than one version of itself: the same shirt in three sizes, the same phone case in five colors, where each version can carry its own price, stock count, and photo. Choosing Variable replaces the single Price field with an Attributes and Variations panel. You define the attributes first (Size, Color, and so on), then generate one variation row per combination and set price and stock on each. That’s a deeper process with its own full walkthrough. See How to Add a Variable Product for the complete steps on attributes, generating variations, and per-variation pricing and images.
Grouped Products
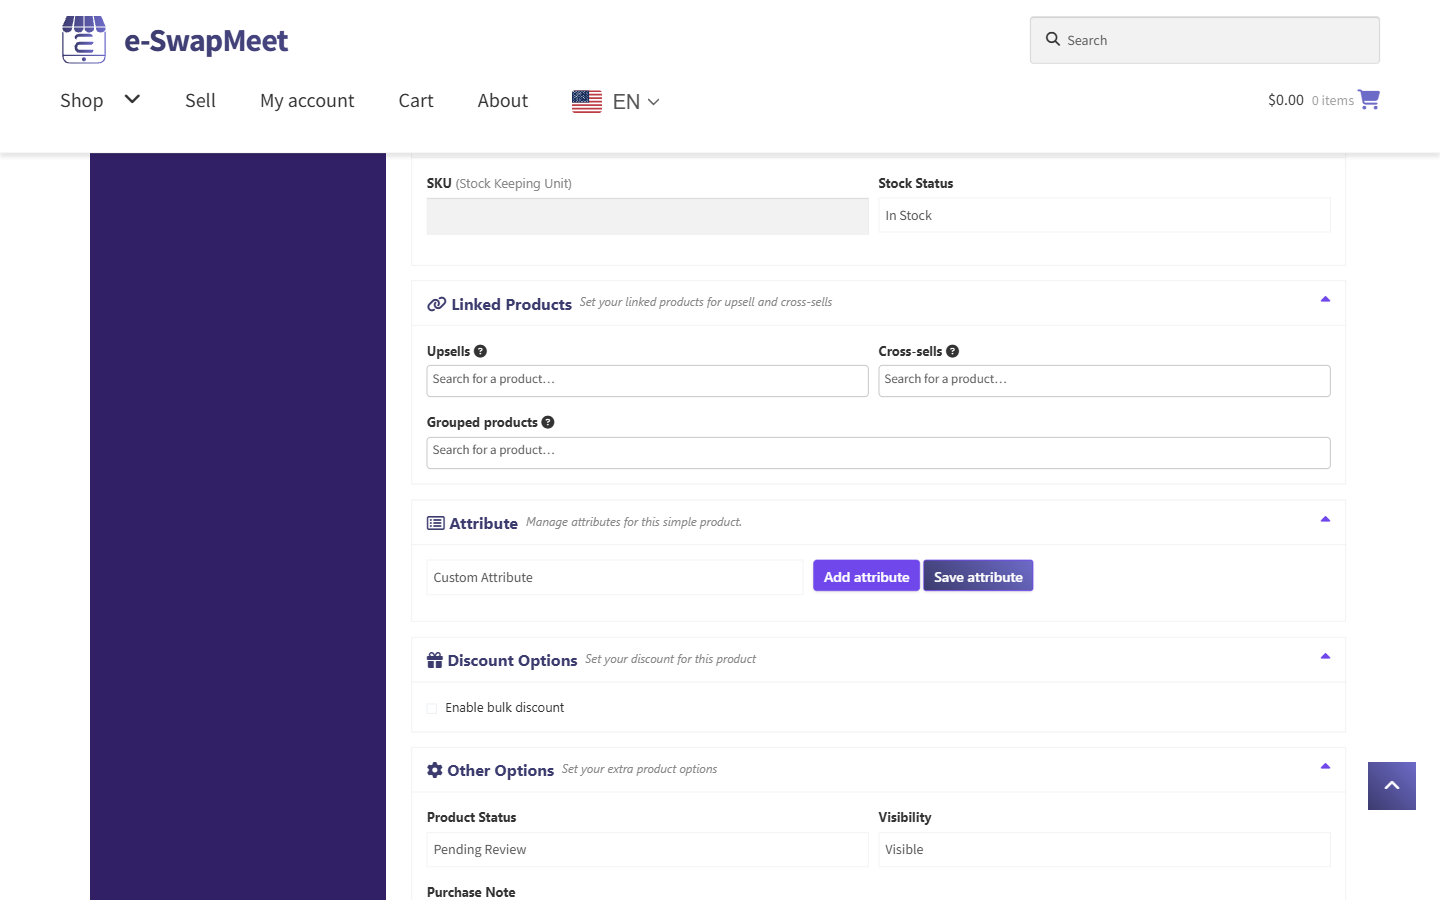
Grouped lets you bundle several of your own listings onto a single product page, so a shopper sees them together and can add more than one to their cart at once. A Grouped listing has no price or shipping class of its own; both come from whichever individual products you add to the group. That’s why the price fields and the entire Shipping and Tax panel don’t appear at all once Product Type is set to Grouped. The field you’ll actually use, labeled Grouped products, isn’t up near the top of the form with Category. It lives further down, inside the Linked Products panel, next to Upsells and Cross-sells.
The products you group together have to already exist as their own separate listings first. The Grouped products search only finds items you’ve already created in your own store; it can’t create new products for you, and it won’t search other vendors’ listings. Set up the individual products first, then build the Grouped listing that ties them together.
External/Affiliate Products
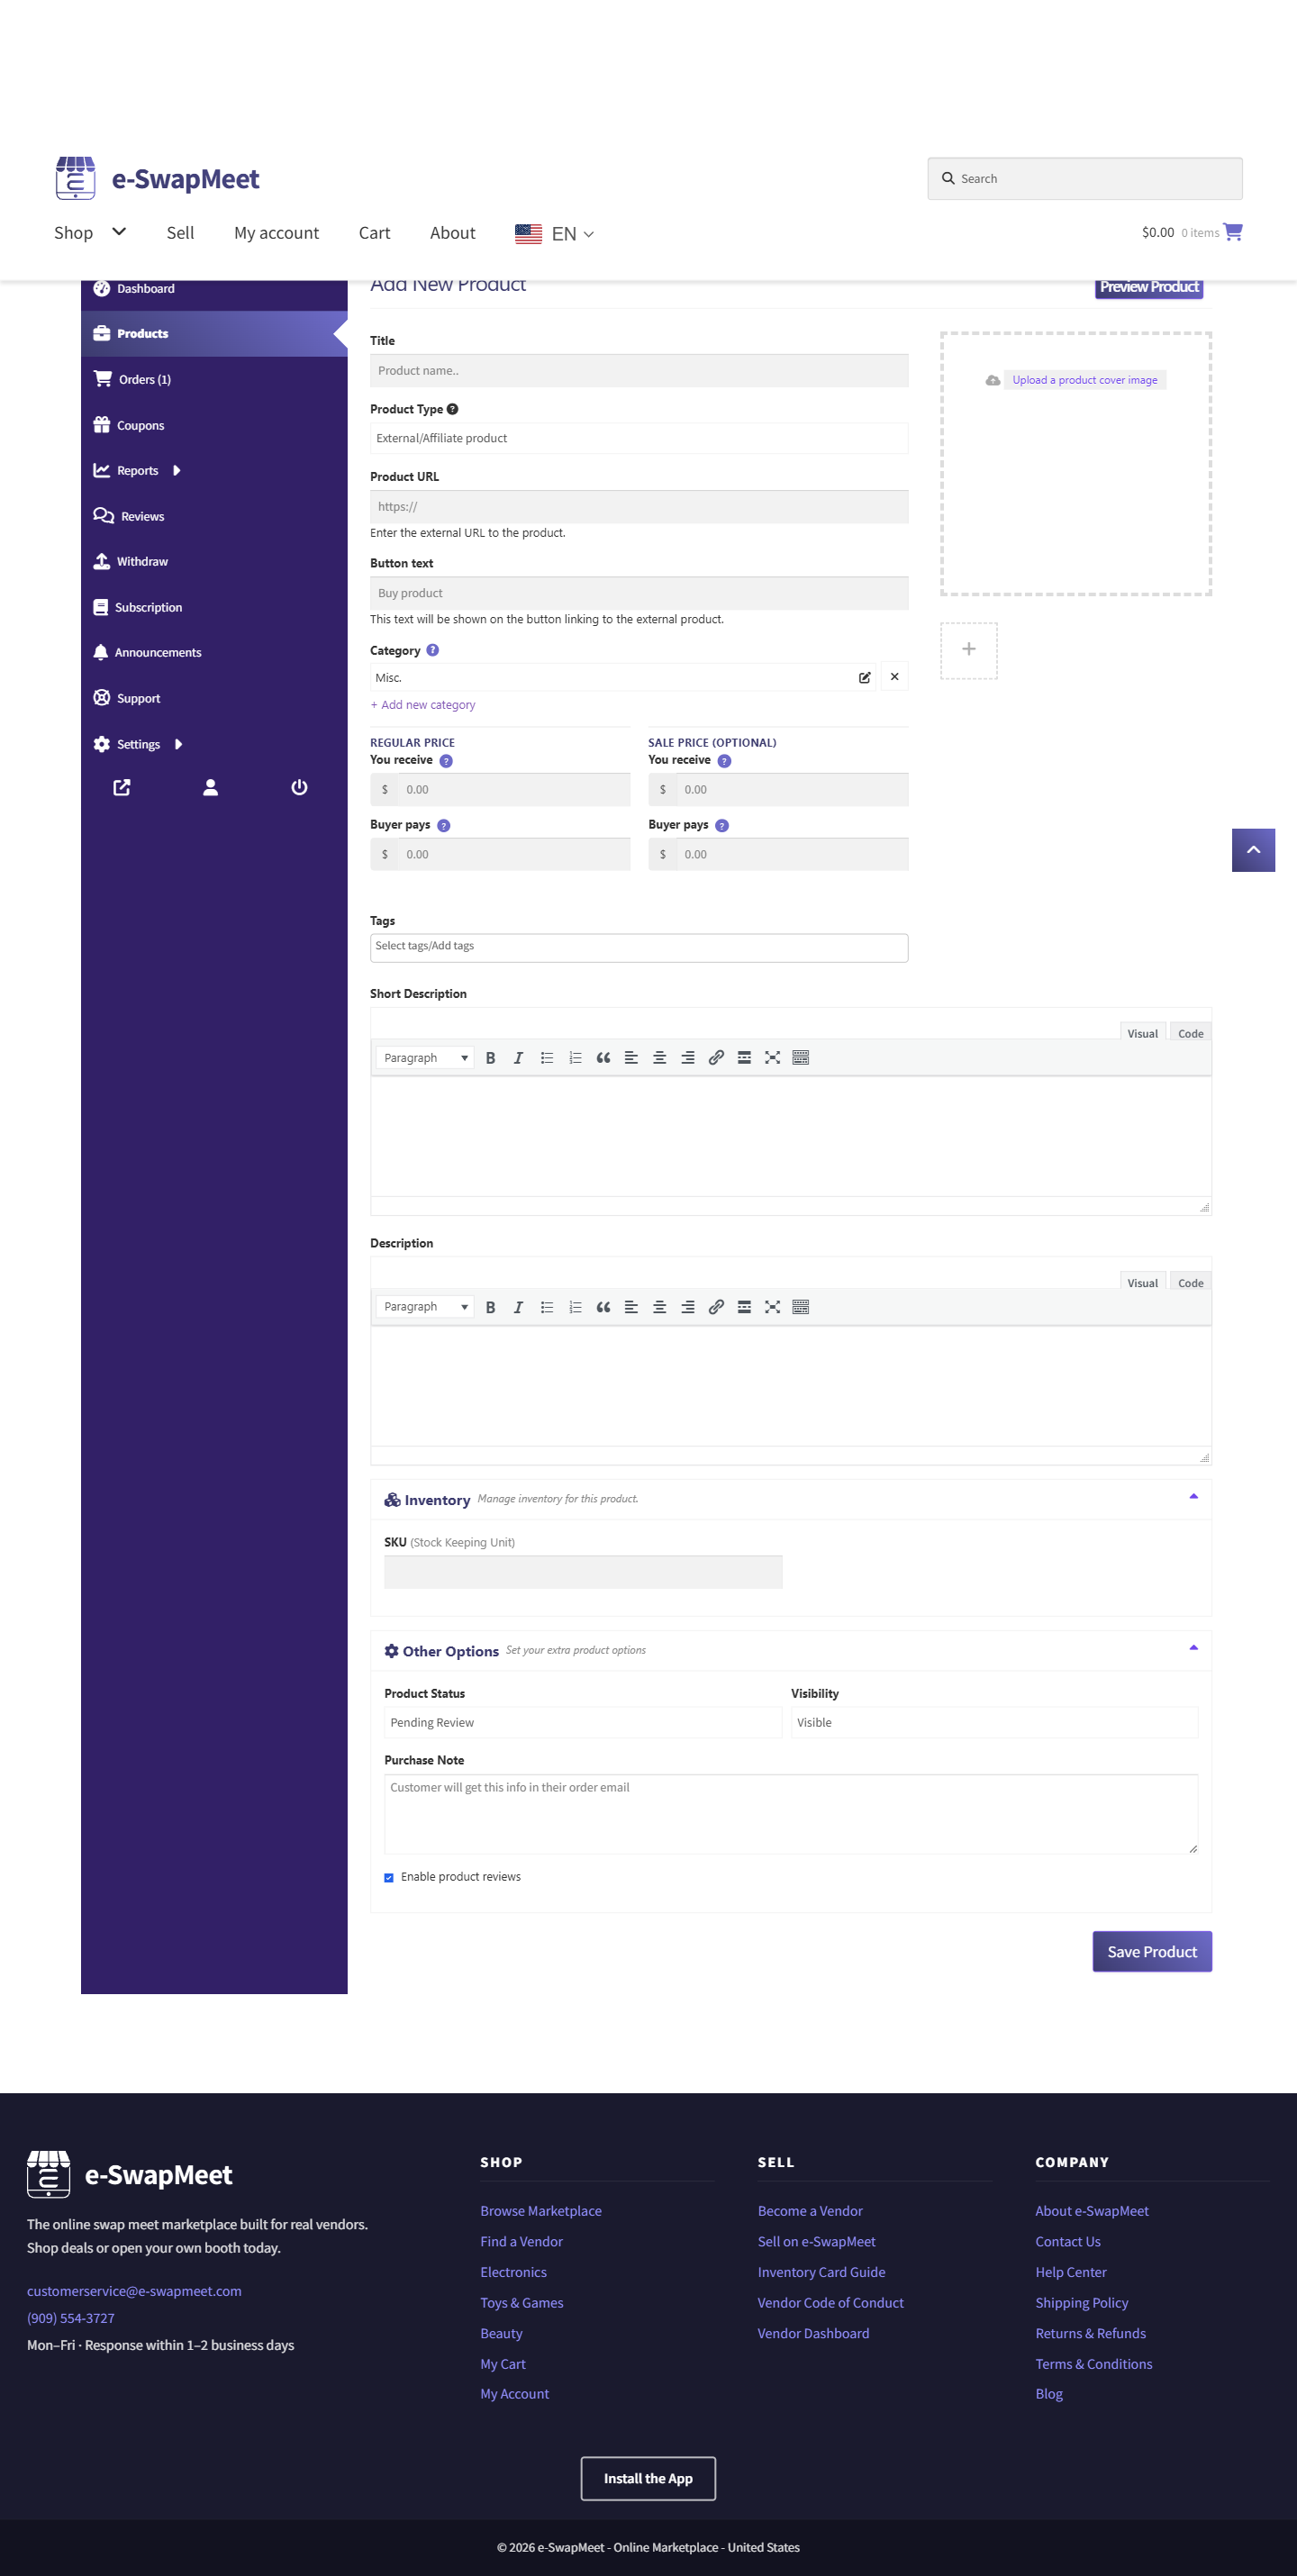
External/Affiliate is for something you’re genuinely selling somewhere else and only want to feature here. Choosing it swaps the usual Add to Cart button for two new fields: Product URL, the page where the buyer actually completes the purchase, and Button text, what the button says (Buy product by default). Price still displays on the listing for reference, but the whole Shipping and Tax panel disappears, since e-SwapMeet never handles delivery on something sold elsewhere.
This is the one product type where the sale genuinely leaves e-SwapMeet. Clicking the button sends the shopper straight to your Product URL. e-SwapMeet’s own cart, checkout, and order history are never part of the transaction, because no order is ever placed on this site. Use External/Affiliate only for items you’re deliberately pointing shoppers to buy elsewhere, not as a way to list something you actually want to sell through your e-SwapMeet store.
For more on how these four types work across WooCommerce stores generally, WooCommerce’s own guide to product types is a useful reference.
How to Set Your Product Type
- Go to Products in your vendor dashboard and open the product you’re editing, or start a new one.
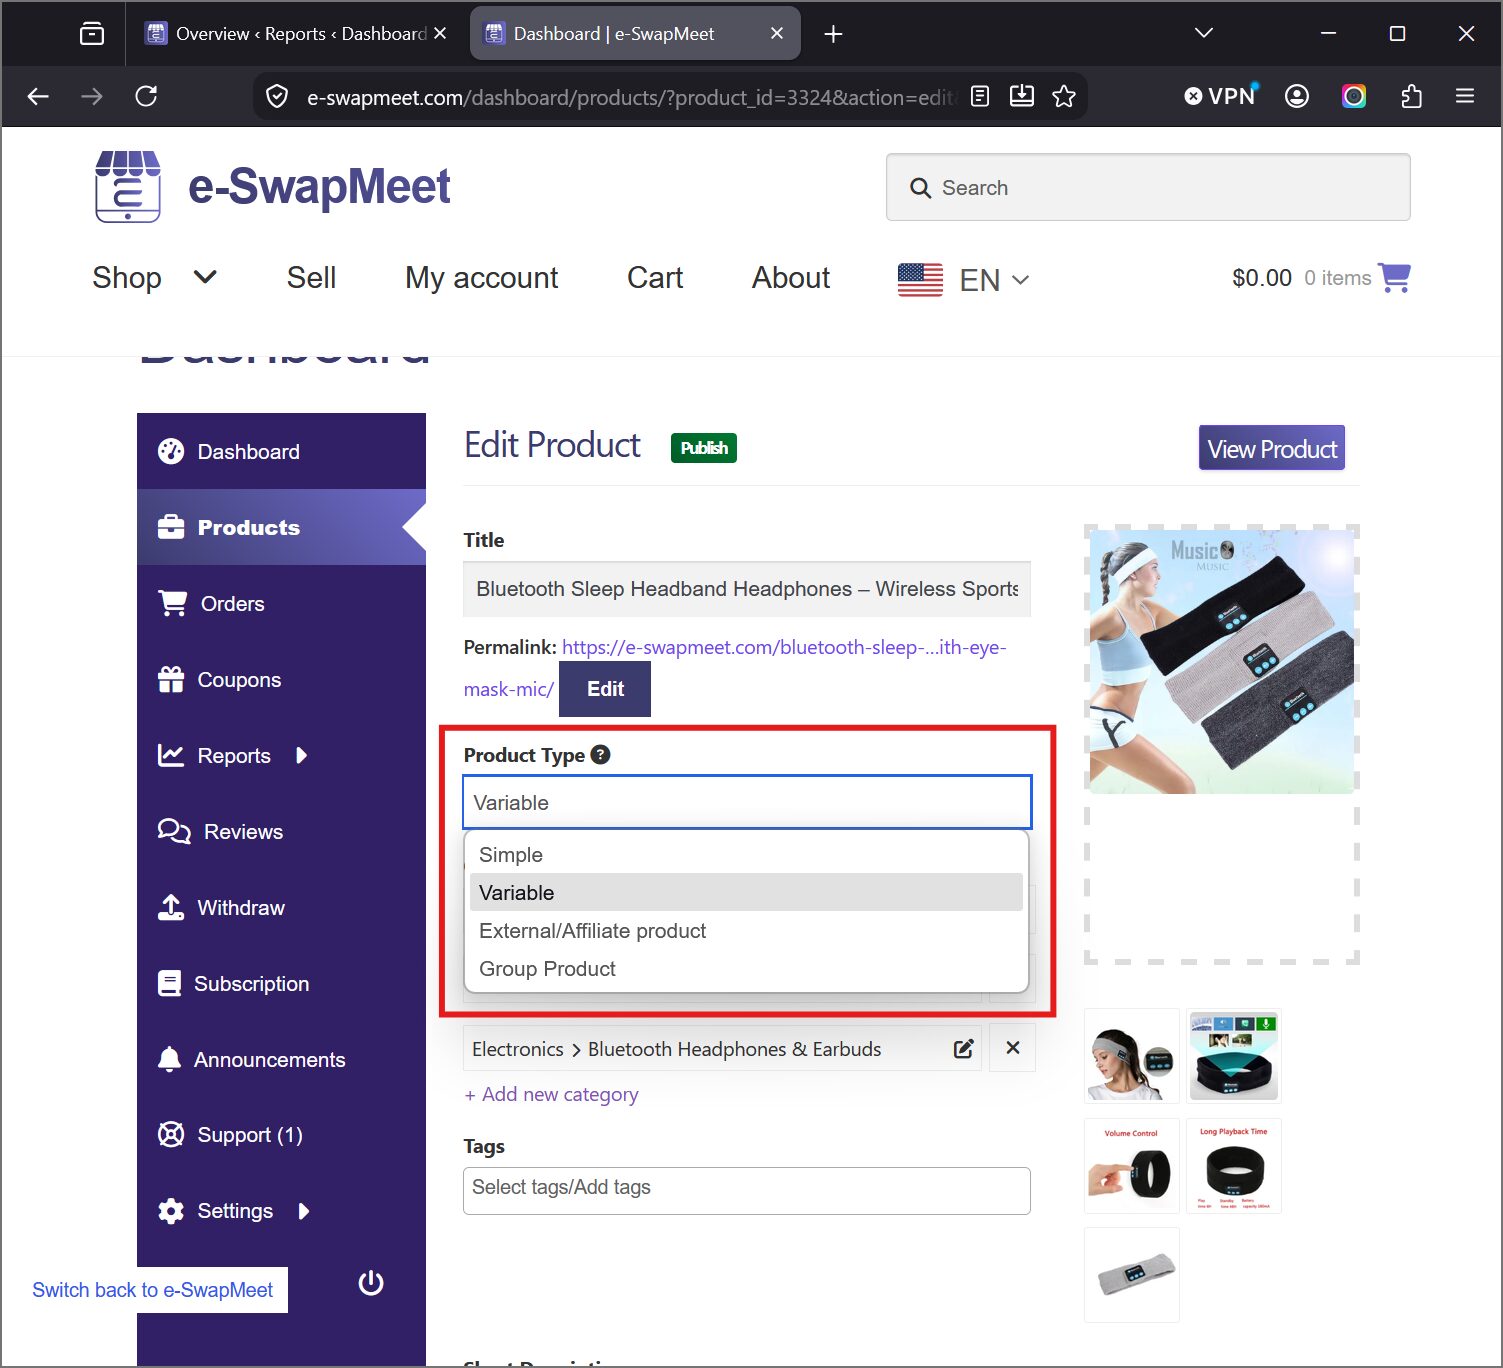
- Find the Product Type field near the top of the form, just under the product Title.
- Open the dropdown and choose the option that matches what you’re listing. All four are shown below.
- The form updates immediately: price fields, the Shipping panel, and any type-specific fields (Product URL, Grouped products) show or hide to match your choice.
- Fill in whatever fields appear and save your product as usual.
Product Type isn’t locked once a listing is published. The same dropdown is there the next time you edit the product, so you can change it later if the item’s needs change.
Choosing Between Simple and Variable
Simple and Variable are the two types most vendors reach for, and the difference comes down to one question: does this item come in more than one real version? If you’re listing a single item with a single price, Simple is faster to set up and has fewer fields to manage. If you’re listing something that comes in sizes, colors, or any other set of true options, each with its own possible price or stock level, Variable is built for exactly that. For the full walkthrough on setting up attributes and generating variations, see How to Add a Variable Product.
Quick Reference
- Simple: use this for a single item with one price and no variations.
- Variable: use this when the same item comes in multiple sizes, colors, or other true options, each with its own price or stock.
- Grouped: use this to bundle several of your own already-listed products onto one page so shoppers can buy more than one at once.
- External/Affiliate: use this only for an item you’re actually selling on another site and want to link shoppers to from e-SwapMeet.